A grill can be the centerpiece of an exceptional outdoor kitchen or the detail that disrupts the entire installation. This guide to grill cutout dimensions is designed to help you avoid the expensive version of “almost right”: a grill that will not seat correctly, a lid that hits a backsplash, or an enclosure with insufficient airflow and no practical service access.
For luxury outdoor kitchens, dimensions are not merely a construction detail. They define the visual precision, operational safety, and long-term usability of the space. The right opening allows your grill to appear fully integrated while preserving the clearances and access points required for professional-grade performance.
Start With the Grill, Not the Counter
The most reliable rule is simple: select the exact grill model before finalizing the countertop or cabinetry. A 32-inch grill does not automatically require a 32-inch cutout. The product name often refers to the approximate cooking-head width or product category, while the actual opening dimensions, overall body dimensions, and clearance requirements can differ considerably.
Every premium grill manufacturer publishes a specification sheet or installation manual for each model. That document is the authority. It will identify the required cutout width, depth, and height, along with minimum clearances to combustible materials, ventilation provisions, gas and electrical requirements, and hood-opening space.
Do not rely on a retailer listing, a previous project, or a rough tape measure taken from the grill carton. A few millimeters can be visible on a meticulously finished countertop, and a small error can become a major issue once stone, porcelain, or metal panels are in place.
Understand the Four Measurements That Matter
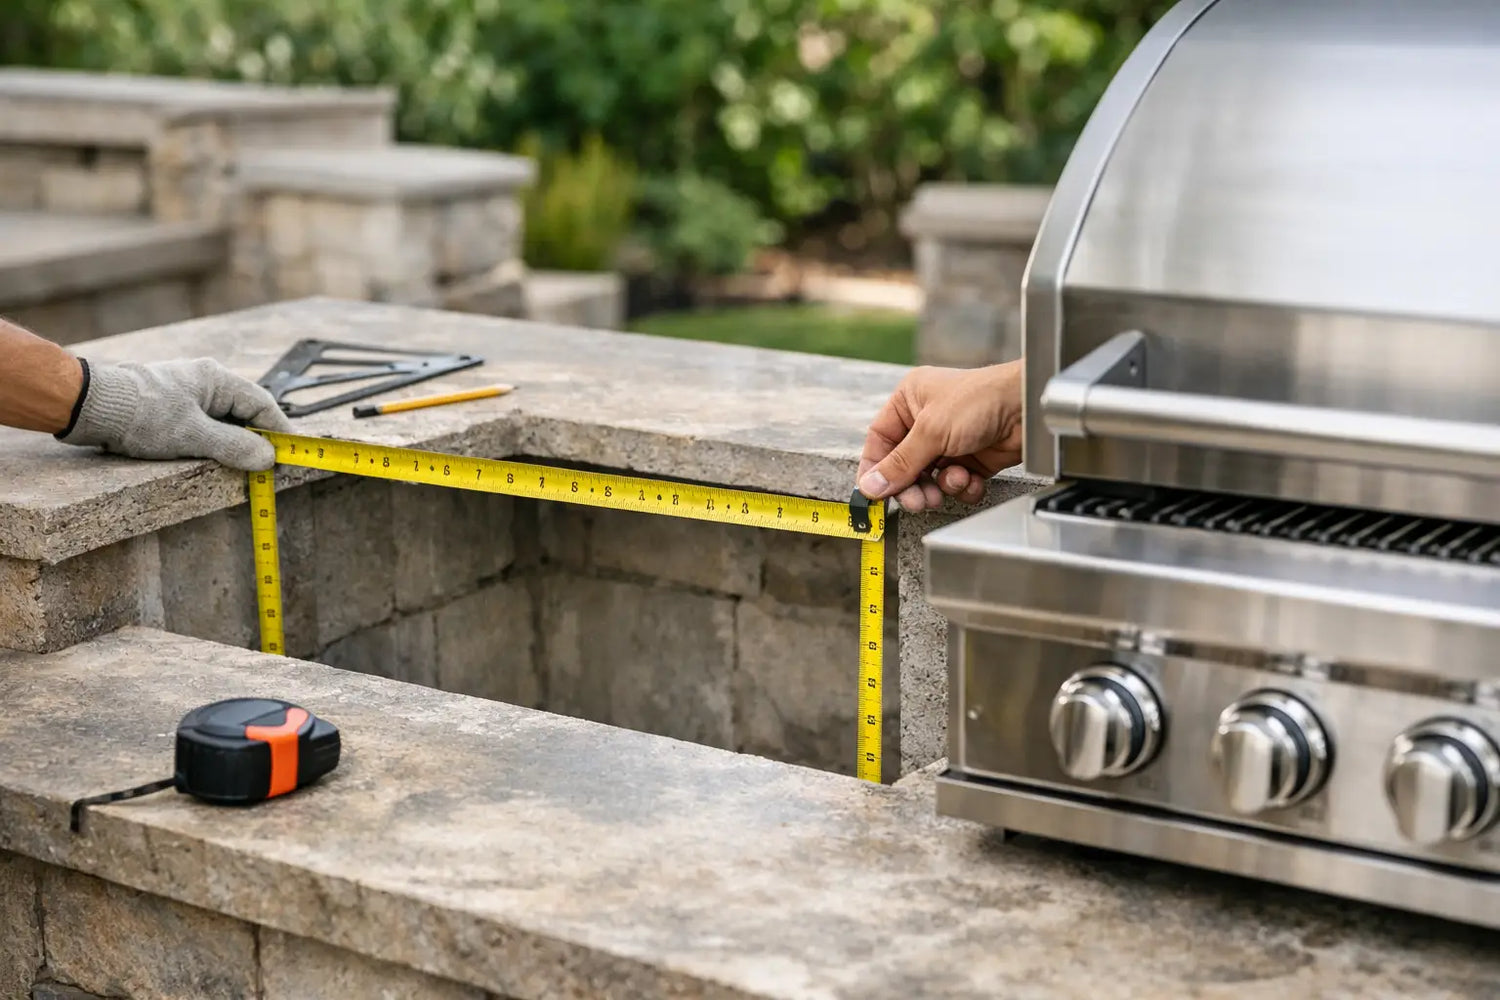
A successful grill installation depends on more than one width and one depth. Confirm these four measurements before your outdoor kitchen goes into production:
- Cutout width is the side-to-side opening in the countertop or grill cabinet where the grill body sits.
- Cutout depth is the front-to-back space required below the countertop, measured according to the manufacturer’s installation instructions.
- Cutout height determines whether the grill rests at the intended level and whether its control panel aligns cleanly with the counter surface.
- Overall grill dimensions include the exterior trim, control panel, lid, handles, rear connections, and any parts extending beyond the cutout itself.
A Guide to Grill Cutout Dimensions: The Details Beyond the Opening
A precise opening is essential, but it is only the beginning. Outdoor kitchens that feel custom-built rather than improvised account for the space around and behind the grill from the first drawing.
Leave Room for the Lid to Open Fully
Measure the grill with the lid open, not just closed. This is especially important where a grill sits beneath a pergola beam, adjacent to a rear wall, or in front of a raised backsplash. Many grills need substantial vertical and rear clearance for the lid to move freely.
The clearance can vary by grill design. A standard hinged lid may require less space behind the unit than a model with a large insulated hood or prominent rear hinge. If your layout includes an overhead shelf, vent hood, or enclosed roof structure, confirm the grill manufacturer’s requirements before committing to a height.
A grill lid that opens only partway makes cooking awkward. More critically, it can place heat too close to a combustible overhead element or restrict the intended airflow around the appliance.
Plan the Countertop Edge Carefully
The front trim of a built-in grill is designed to overlap the cutout edge. That overlap hides the opening and creates a finished appearance, but it should never be treated as a solution for an oversized or poorly positioned cutout.
A clean installation keeps the opening within the manufacturer’s tolerance and supports the grill evenly. Natural stone, sintered stone, porcelain, and other premium counter materials should be cut with the grill’s weight, trim profile, and thermal conditions in mind. Your fabricator should also know whether the grill requires support from below rather than from the countertop lip.
This distinction matters. Some grills are engineered to sit on their flange, while others require a supporting shelf, rails, or cabinet structure beneath the firebox. The installation manual will specify the correct method.
Protect Space for Gas, Power, and Service
Built-in grills need more than room to cook. They need space for connection, inspection, and future service. Gas inlets, regulators, electrical cords, rotisserie outlets, battery compartments, and ignition components may be positioned at the rear, side, or bottom of the unit.
Avoid designing the grill cavity so tightly that a technician cannot reach the connection point without removing countertop sections or dismantling cabinetry. A refined outdoor kitchen should make maintenance feel considered, not disruptive.
For gas grills, use a qualified professional to plan the fuel connection, shutoff valve, and local code requirements. For electric ignition, lighting, or rotisserie functions, ensure the electrical supply is correctly located and rated for outdoor use. The exact utility layout depends on the appliance and jurisdiction, so there is no universal shortcut.
Ventilation Is a Design Requirement, Not an Add-On
Ventilation is among the most overlooked elements in grill cutout planning. A grill enclosure can retain heat and, in the case of gas appliances, allow unburned gas to accumulate if it is not properly ventilated.
Most built-in gas grill manufacturers specify ventilation openings in the enclosure. These are commonly placed low and high to promote circulation, but the required size and location vary by model and by whether the grill is installed in a combustible or noncombustible structure. Follow the appliance instructions exactly.
Do not conceal vents for the sake of a cleaner facade. In a premium kitchen, ventilation should be incorporated elegantly through aligned grilles, shadow gaps, or integrated architectural details. Good design does not eliminate functional requirements. It gives them a deliberate place.
If propane is stored within the kitchen module, the ventilation requirements can be more stringent because propane is heavier than air. In many installations, storing the tank in a dedicated, ventilated compartment is the safer and more practical choice. Natural gas layouts have different considerations, including pipe routing and shutoff access.
Combustible Versus Noncombustible Construction
The material surrounding the grill changes the installation requirements. Stainless steel, masonry, concrete, and certain engineered panels are generally considered noncombustible, while wood framing and many composite materials are not.
That does not mean every metal-clad cabinet is automatically suitable for any grill. The internal construction, insulation, air gaps, and appliance requirements still matter. A grill installed near combustible materials may require an insulated jacket or liner specifically designed for that model.
An insulated jacket can protect the surrounding structure and allow a more compact installation, but it also changes the dimensions you need to plan for. In that case, use the jacket’s cutout dimensions rather than the grill’s standard built-in dimensions. This is one of the most common sources of ordering errors.
For high-end projects, the smartest approach is to make the grill, jacket, cabinet construction, countertop, and ventilation strategy one coordinated specification. That is how the kitchen maintains crisp proportions without compromising safety.
Match the Cutout to Your Outdoor Kitchen Layout
A grill opening should be positioned for how the kitchen will actually be used. The goal is not simply to fit the appliance into a run of cabinets. It is to create a cooking zone that works naturally when guests arrive and the grill is in full use.
Allow landing space on both sides of the grill. A practical minimum depends on the kitchen size and grill model, but more surface area is always valuable for trays, tools, and serving platters. If space is limited, prioritize a usable landing zone on the side nearest the prep area.
Consider the grill’s relation to drawers, doors, and adjacent appliances. A refrigerator door should not open into the cook’s working position. Pullout waste should be convenient without blocking the grill. Side burners, pizza ovens, and smokers introduce their own clearance and heat requirements.
For a linear kitchen, the grill often becomes the visual anchor. In an L-shaped or island layout, it may work best facing the entertaining area while the prep and washing zones sit just behind or beside it. The right answer depends on circulation, views, prevailing wind, and the way the property is used.
Measure Twice Before You Commit
Before ordering a grill cabinet or cutting a countertop, review the final specification sheet against the design drawing. Confirm the grill model number, fuel type, insulated jacket requirement, cutout dimensions, countertop thickness, rear clearance, lid clearance, ventilation, and utility locations.
It is also wise to verify measurement units. American grill documentation is usually presented in inches, while European-manufactured kitchens may be planned in millimeters. Convert carefully and keep one primary unit system throughout the project to prevent rounding errors.
ELEEXA outdoor kitchen modules are designed to bring this coordination into a refined, pre-assembled solution, with integrated grill compatibility that removes much of the uncertainty from a conventional site-built installation. Even then, the chosen grill’s official specifications remain the final reference point.
The best grill cutout is not the one that merely accommodates an appliance. It is the one that makes every line look intentional, every connection accessible, and every outdoor gathering feel effortless from the first flame onward.