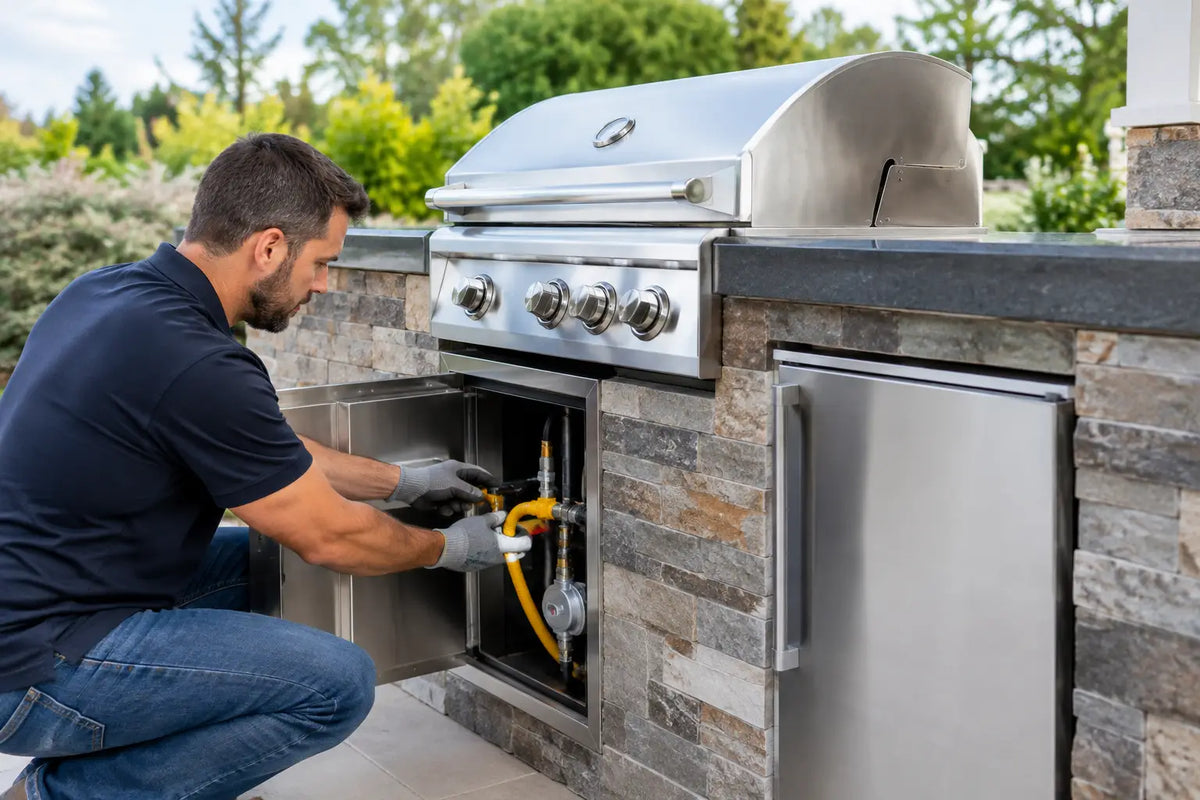
A luxury grill island should feel effortless once the guests arrive. That experience is decided long before the first dinner service, when you connect utilities to grill islands with the right clearances, routes, shutoffs, and professional trades. Gas that is undersized, outlets placed as an afterthought, or water lines exposed to freezing temperatures can turn a beautiful outdoor kitchen into a costly correction.
The most refined installations make the technical work disappear. Your grill lights instantly, refrigeration stays dependable, the sink functions where it is needed, and every service point remains accessible without disrupting the architecture of the space. The goal is not simply to bring power and water outdoors. It is to create a high-performance entertaining environment that looks considered from every angle.
Start With the Island Layout, Not the Utility Trench
Utilities should follow the outdoor kitchen plan, not dictate it. Before excavation or rough-in work begins, finalize the grill model, refrigerator location, sink position, ice maker, side burner, and any specialty equipment. Each appliance has its own fuel, electrical, ventilation, and clearance requirements. A grill island designed for a built-in gas grill will have very different infrastructure from one centered on a ceramic charcoal cooker or a fully electric cooking surface.
Map where the island will sit, how people will circulate around it, and where utilities can enter discreetly. The cleanest route is not always the shortest. A direct line may cross a patio expansion joint, interfere with drainage, or leave a shutoff valve inaccessible behind cabinetry. For premium properties, the better solution is usually a coordinated utility corridor that protects the visual calm of the terrace while preserving easy service access.
This is also the moment to decide whether the island is truly self-contained. A grill-only configuration may need gas and electricity, while a full outdoor kitchen can require cold water, hot water, drainage, dedicated refrigeration circuits, and provisions for future upgrades. Planning capacity now is far less disruptive than opening finished paving later.
Gas: Size the Supply for Real Cooking Power
For many grill islands, gas is the highest-priority utility and the one that deserves the most disciplined planning. Natural gas and propane installations are not interchangeable. The appliance, regulator, pipe sizing, shutoff arrangement, and local code requirements must match the selected fuel type.
A licensed gas professional should calculate the required load based on the total BTU demand of every connected appliance. That includes the main grill, side burner, power burner, outdoor heater, and any future equipment expected to run on the same line. A line that appears adequate for one grill can lose performance when multiple burners are operating at once. The result is weak heat exactly when you are cooking for a full table.
Install an accessible, clearly identified shutoff valve near the island, in accordance with local code and the appliance manufacturer’s instructions. It should be reachable without removing panels or moving furniture. In most cases, the gas connection also needs a flexible, approved connector at the appliance, but that connector is not a substitute for correctly installed hard piping.
Ventilation inside the island matters just as much. Gas grills and propane systems require appropriately placed ventilation openings to prevent gas accumulation within enclosed cabinet cavities. Do not assume a beautiful cabinet face provides enough airflow. The grill manufacturer’s cutout specifications and ventilation guidance are part of the engineering, not optional finishing details.
Electrical Power: Build for More Than the Grill
Electricity brings an outdoor kitchen to life. Even if the grill itself is gas-fired, you may need power for ignition, rotisserie motors, interior lighting, task lighting, a refrigerator, beverage center, ice maker, outlets, or a ventilation hood in a covered structure.
Outdoor circuits should be designed by a qualified electrician and protected as required by the applicable electrical code, typically with GFCI protection. Weather-rated boxes, covers, conduit, fittings, and cable methods are essential. A standard indoor outlet installed near a patio door is not an outdoor-kitchen electrical strategy.
Dedicated circuits are often the right choice for refrigeration and ice-making equipment. These appliances draw more power than homeowners expect, and sharing a circuit with countertop outlets or lighting can create nuisance trips. If the island sits far from the main panel, voltage drop may also need consideration. A professional can specify the conductor size and circuit layout that keeps equipment operating reliably.
Think about usability, not just compliance. Place countertop outlets where they can support small appliances without trailing cords across the cooking zone. Add low-glare task lighting where food is prepped and served. If the kitchen will be used after dark, lighting should be integrated into the design from the beginning rather than added as visible fixtures after the cabinetry is installed.
Water and Drainage: Choose the Right Level of Convenience
A sink changes the way an outdoor kitchen performs. It makes prep cleaner, handwashing easier, and hosting more relaxed. But it also introduces decisions about supply lines, winter protection, drainage, and local regulations.
Cold water is the baseline for many outdoor sink installations. Hot water can be worthwhile for properties used year-round, particularly where the outdoor kitchen supports frequent entertaining or hospitality service. Both supply lines should be protected from sunlight, impact, and freezing conditions. In seasonal climates, include a practical winterization strategy, such as accessible shutoffs and drain-down points.
Drainage is the point where location matters most. Some jurisdictions allow an outdoor sink to connect to the home’s sanitary drainage system, while others impose specific requirements or prohibit certain arrangements. Routing gray water onto the ground may be restricted, unsanitary, or unsuitable for the property. Never treat drainage as a minor add-on. Confirm the approved method with a licensed plumber and local authority before the countertop is cut for a sink.
If permanent plumbing is impractical, a water-ready island can still be a smart investment. It can be positioned near an existing water source, fitted with a temporary seasonal solution where permitted, or designed with capped utility access for a future connection. The right choice depends on climate, frequency of use, and the level of permanence you expect from the outdoor living space.
Permits, Clearances, and Site Conditions
Outdoor kitchens sit at the intersection of building, gas, electrical, and plumbing rules. Permit requirements vary by municipality, but overlooking them can delay inspections, affect insurance, or complicate a future property sale. A qualified installer or local trade professional can determine which permits and inspections apply before work begins.
Clearances also deserve close attention. Grills produce substantial heat, and islands must be positioned away from combustible surfaces, overhangs, windows, and air intakes according to the grill manufacturer’s instructions. A covered patio can be spectacular, but it may require additional ventilation or may not be compatible with every grill type. Wind direction, roof height, and nearby landscaping all influence comfort and safety.
The ground below the island matters, too. A heavy, fully equipped outdoor kitchen needs a stable, level base that can support cabinetry, stone surfaces, appliances, and concentrated foot traffic. Plan utility sleeves before pouring a new slab whenever possible. On existing patios, verify that openings can be made without compromising structure, drainage, or waterproofing.
A Smarter Installation Sequence
The best installations are coordinated in phases. First, finalize the appliance schedule and island configuration. Next, have the site assessed for utility capacity, routing, drainage, and code considerations. Then complete rough-ins before the island is positioned, leaving correctly placed connection points ready for final hookup.
Once the grill island is installed and level, licensed professionals can make the final gas, electrical, and plumbing connections, test each system, and confirm appliance operation. Keep service panels, shutoffs, and junction points accessible. A luxury outdoor kitchen should look monolithic, but it should never be impossible to maintain.
Pre-assembled modular systems can reduce the uncertainty of this process because cabinet dimensions, appliance cutouts, and utility pathways are established before delivery. With ELEEXA, the island arrives as a refined architectural element rather than a collection of parts, allowing installers to focus on accurate final connections instead of on-site cabinet construction.
The Details That Protect the Investment
A few decisions separate a finished-looking installation from a truly durable one. Use weather-rated materials around all utility penetrations. Seal openings carefully while avoiding a configuration that traps moisture inside cabinetry. Maintain required air gaps and ventilation openings. Label shutoffs and circuits so a future homeowner, property manager, or service technician can work confidently.
Do not bury connectors, conceal electrical junction boxes, or rely on extension cords as permanent power. These shortcuts may save time on installation day, but they undermine safety, serviceability, and the polished standard expected of a premium outdoor space.
When utilities are planned with the same precision as the cabinetry and appliances, the outdoor kitchen becomes easy to own. The final connection should be the quietest part of the project: a professional last step that leaves you free to light the grill, set the table, and enjoy a space built to perform beautifully for years.